Microsoft PowerPoint is commonly used to create slide show presentations. Typically these include a combination of text, tables, images, charts, and graphics. This content can be accessible to users with disabilities, including assistive technology users, if the author follows the core principles outlined in our Documents page. The following information includes basic steps for applying these core accessibility principles.
Use Built-in Slide Templates
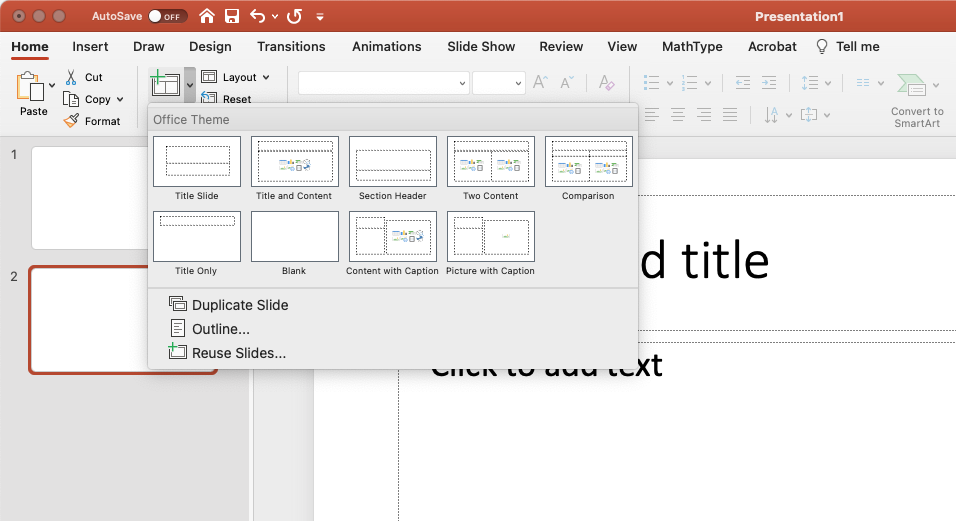
Built-in slide layout templates are designed with accessibility in mind.
Avoid selecting a blank slide and adding text boxes as these elements may not be recognized by assistive technology, and reading order will be compromised.
Instead, select the drop-down “New Slide” option from the Home tab and choose a layout that best fits.
Use Unique Slide Titles
People who use a screen reader skim slide titles to navigate; they can quickly scan through a list of slide titles and go right to the slide they want. Using unique slide titles allows users to clearly understand which slide they are on.
Avoid using the same title for slides that have spill-over information, consider including additional information such as ‘Slide Title 1 of 2’.
Set Reading Order of Slide Contents
Screen readers can read the elements of a slide in the order they were added, but this may be very different from the order in which things appear visually on screen.
To make sure everyone reads the contents in the order you intend, it is important to check the reading order by using the Selection Pane. To do this, from the Home tab select the “Arrange” drop-down and click on “Selection Pane…” From this new window, you can drag elements to adjust the reading order of the contents on the slide.
NOTE: The reading order in the Selection Pane should be arranged from the bottom up: The title should be at the very bottom with subsequent content moving upward.
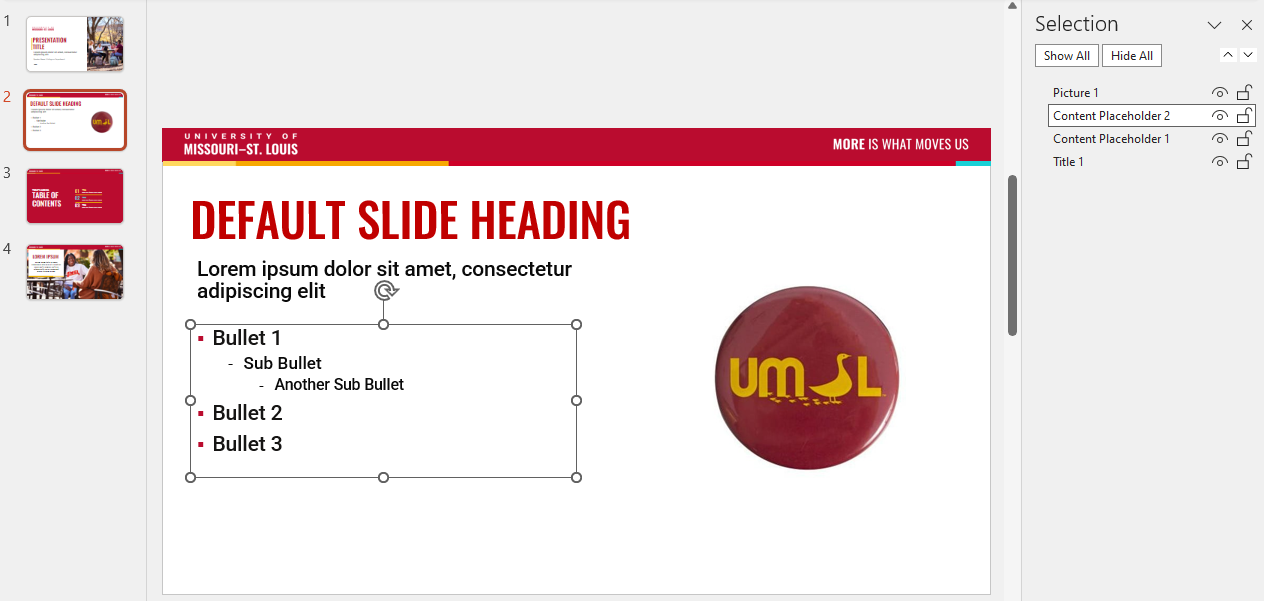
NOTE: The “eye” icon to the right of each slide element can be toggled on or off to hide or show the content visually. When considering whether to use this feature, please note that screen readers vary in how they handle it: Some will still read the visually hidden content; others will not.
Links
PowerPoint slides can serve different purposes depending on how they are shared. They can be used as a visual medium, but can also function as a document archive, as such the best way to accessibly present hyperlinks depends on the context of the PowerPoint.
If the presentation is distributed digitally (e.g., uploaded or emailed after the session) you should use descriptive link text instead of pasting the full URL. This makes it easier to read and navigate for screen reader users and helps everyone understand the destination of the hyperlink. For more details on descriptive link text visit our Links in Documents page.
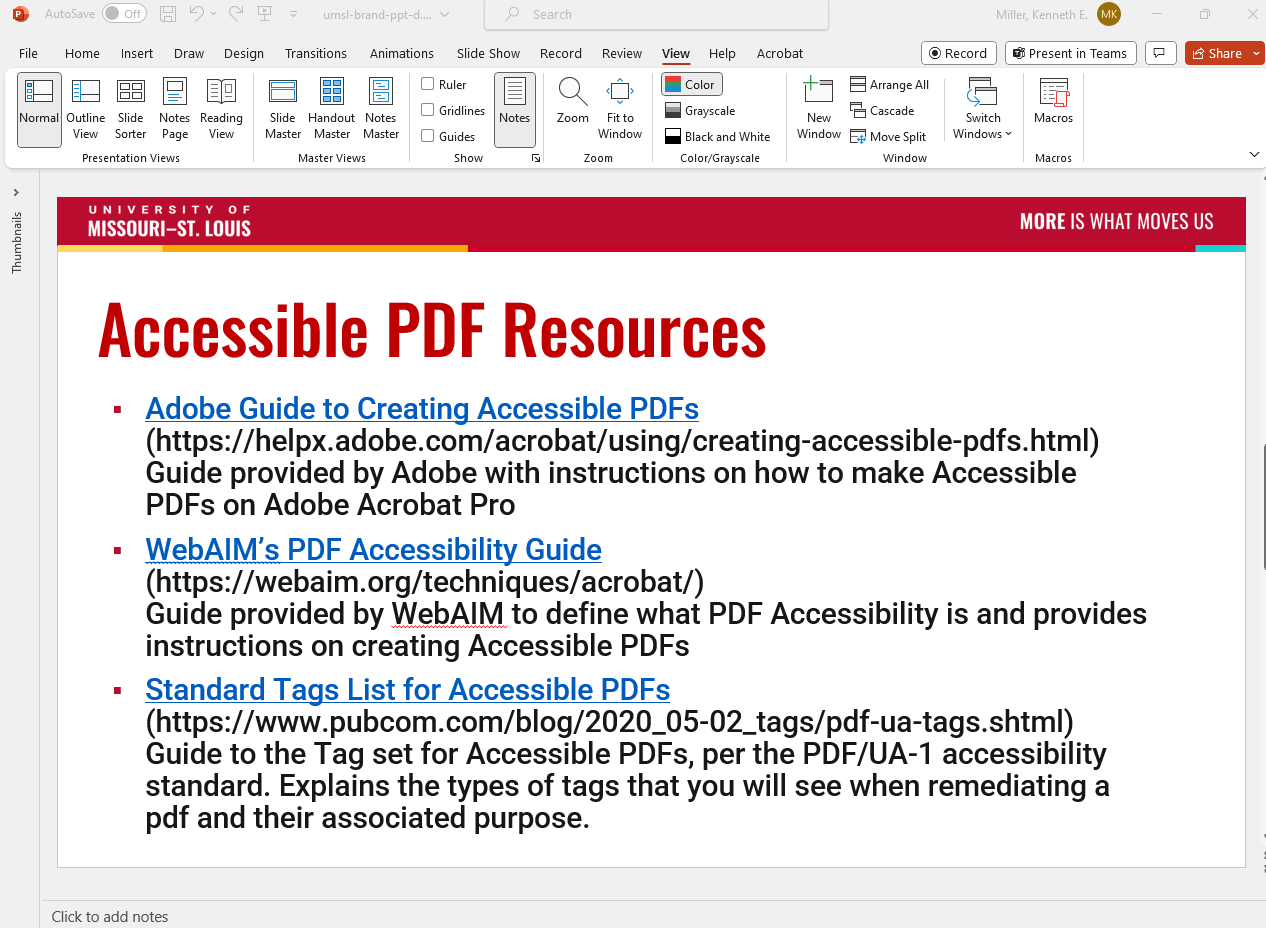
If the presentation is shown live and you want participants to follow along by visiting a webpage during the session you should include both the descriptive link text and the plain URL (not hyperlinked.) This allows participants to easily type the address themselves if they cannot click the link directly.
Below is an example of both methods, in this case the presenter is distributing this slideshow to participants (inclusion of descriptive link text) and is listing the whole URL for participants to access the links during the presentation. They have also included a longer description of the end destination of the links so users know what to expect when they input the URL. Choose which option fits the purposes of your presentation best.
Alt Text & Grouped Images
As always, make sure that images use alt-text.
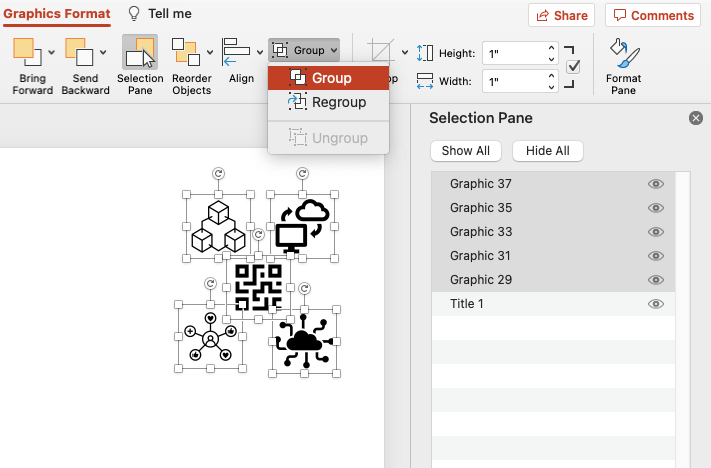
PowerPoint has the ability to group multiple images into a single, flat image. This allows the user to assign alt-text to a group of related images rather than assigning alt-text to each image element.
To group images, select all of the items you would like to group by holding the Control key for Windows or the Command key for Mac, and click on each item. From the Graphics Format tab, click on the Group drop-down menu and select ‘Group.’ This will flatten the image and allow the user to assign alt-text to the group image.
For more information on alternative text visit our Images in Documents page.
For more detailed information on how to create accessible PowerPoint presentations, visit the Microsoft Accessibility Support website, or view WebAIM’s article on PowerPoint Accessibility.